Blog Importing Unity Scene into a C++ Engine
Introduction
Context
During my third year of Game Programming at SAE, we were asked to create a game on a custom C++ engine that could be played on the Nintendo Switch. So we develop the AerRacers project which you can find more details on my post-mortem.
During this project, we decided to use Unity to design the level. For this, we had to set up a scene system that could be imported from Unity.
Problematic
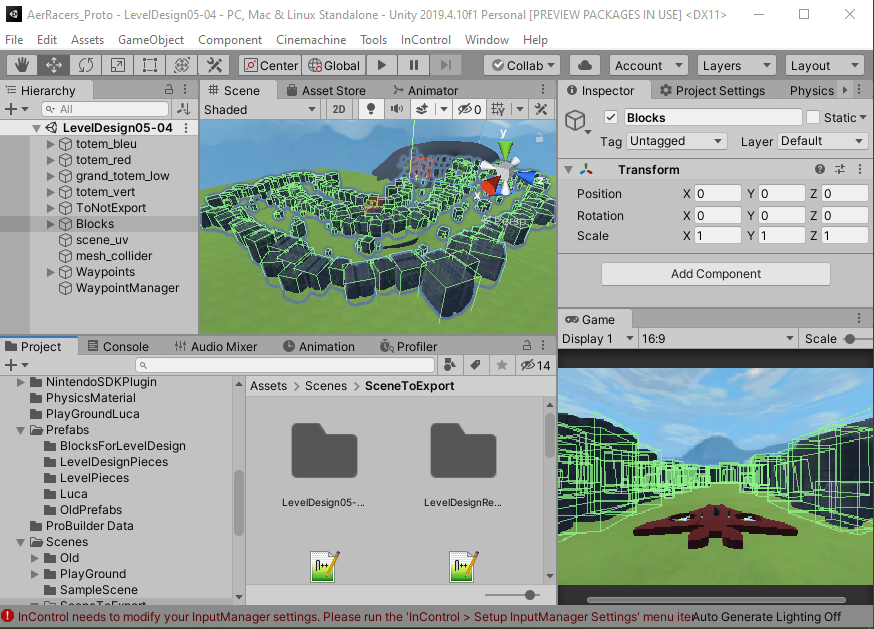
We chose to implement the level design on Unity because it allowed us to use the Unity editor tools without having to recreate them in the NekoEngine.

Editor in Unity
Moreover, the whole team is used to Unity, it allows us to avoid wasting time on the handling of a new tool.
Finally, this decision was inspired by the previous student’s team who had used the same technique.
The objectives of the scene system were then :
- Export a Unity scene
- Load the scene in the ECS (Entity Component System)
- Save the modifications on the scene
As we already had a JSON import in Neko, we decided to export and import the scenes in JSON.
Scene Exporter
The Unity scene export system has been implemented by William and Solange in their Tool Programming module.
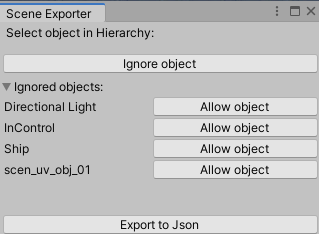
The tool is a Unity window allowing to select the objects not to be exported and to save the .aerscene file to the desired location.

Tool Scene Exporter in Unity
Scene Exportation
The first step was to export the components. To do this, they have set up Serializable structures for each component allowing them to be exported in JSON.
So for each object, they exported the information of all the components.
As they used the serialization system of Unity, it was not possible to export a different number of components per entity. Therefore, due to lack of time, we decided to export all components for each entity. If I had to do it again, I would write the JSON objects by hand to avoid writing and reading non-existent components.
In addition to the components, each entity had its instance id and the instance id of its parent, the index of its tag and layer, and its name. Moreover, it is indicated if it is active or not.
[Serializable]
public class EntityData
{
    public string name;
    public string tag;
    public string layer;
    public int instanceId;
    public int parent = -1;
    public int chunkId; // chunk ID not available
    public bool isActive;
    public TransformData transform = new TransformData();
    public RigidbodyData rigidbody = new RigidbodyData();
    public ShipControlsData shipControl = new ShipControlsData();
    public ModelRendererData modelRenderer = new ModelRendererData();
    public WaypointData waypoint = new WaypointData();
    public MeshColliderData meshCollider = new MeshColliderData();
}
Finally, we have exported the whole scene with all the components and the list of tags and layers
JSON Files
Once this Json file was created, I set up a JSON Validator which allows me to check that the JSON is correct and that it contains all the necessary information for the import. It could then be integrated directly into the generation of data to verify during the generation of the scene is correct.
    "objects": {
      "type": "array",
      "items": {
        "type": "object",
        "required": [ "name", "instanceId", "parent", "layer", "tag", "transform" ],
        "properties": {
          "name": { "title": "Name", "type": "string" },
          "active": { "title": "Active", "type": "boolean" },
          "instanceId": { "title": "Instanceid", "type": "integer" },
          "parentId": { "title": "parentId", "type": "integer" },
          "layer": { "title": "Layer", "type": "string" },
          "tag": { "title": "Tag",  "type": "string" },
          "transform": {
            "title": "Transform",
            "type": "object",
            "required": [ "position", "rotation", "scale" ],
            "properties": {
              "position": {
                "title": "Position",
                "$ref": "#/definitions/vector3"
              },
              "rotation": {
                "title": "Rotation",
                "$ref": "#/definitions/vector3"
              },
              "scale": {
                "title": "Scale",
                "$ref": "#/definitions/vector3"
              }
            }
          },
Scene Importer
So, based on the JSON file exported by the Unity tool, I created a SceneManager that loads the scene and creates the entities and components.
The first step of the loading of the scene is the recording of the parameters of the scene. Its parameters are saved in a scene structure to be able to load several scenes. As I realize that we only needed one scene, I decided to abandon this feature.
struct Scene
{
	std::string sceneName           = "New Scene";
	std::string scenePath           = "";
	std::vector<std::string> layers = {INVALID_LAYER};
	std::vector<std::string> tags   = {INVALID_TAG};
	bool saved                      = true;
};
When importing, I first check if the entity is active because I don’t use inactive entities, then I instantiate the entity in the ECS. I register the instance id and the instance id of the parent to use them later. Indeed, since the order is not defined and a child can be exported before a parent, the organization of the entity hierarchy is done only after all entities have been created. Finally, after defining the tag and layer index of the entity, I import all the components of the entity.
The import of the components is done in 3 steps:
- First, I check that the component object exists in the JSON and that the component is present on the entity.
- Then, I create the component in the ECS. As we use ECS, the component is not defined in the entity. It is defined in an array of components with the same number of elements as the number of the entity. Moreover, the possession of a component by an entity is also defined by an array of bytes containing the possessed components.)
- Next, I import the parameters of this component. For this, I have set up a Component Viewer system to take care of the serialization of the components of the Component Manager. Each Component Manager has a Component Viewer that will read and write the component information from JSON but also display the component information in Imgui.
class ComponentViewer
{
public:
    explicit ComponentViewer(
        EntityManager& entityManager)
        : entityManager_(entityManager) { }

    virtual ~ComponentViewer() = default;

    virtual json GetJsonFromComponent(Entity) const = 0;

    virtual void SetComponentFromJson(Entity, const json&) = 0;

    virtual void DrawImGui(Entity) = 0;
protected :
    EntityManager& entityManager_;
};
As each component has a unique way of defining the information, it was important to let each component read the information from the JSON as it wanted.
So, once the scene is finished loading, all the entities are defined with the right components and their right information.

Diagram Scene Importation
Scene Saving
In addition, there is also a scene-saving system to save changes made to the scene.
To do this, I write the same information I read in the scene for the scene information, the entity information, and the component information that I also export with the Component Viewer.
In order to make the loading of the scenes easier, I have set up a tool to display the scenes that can be loaded and to load them and save them.

Tool Scene Loading
Conclusion
What has been done
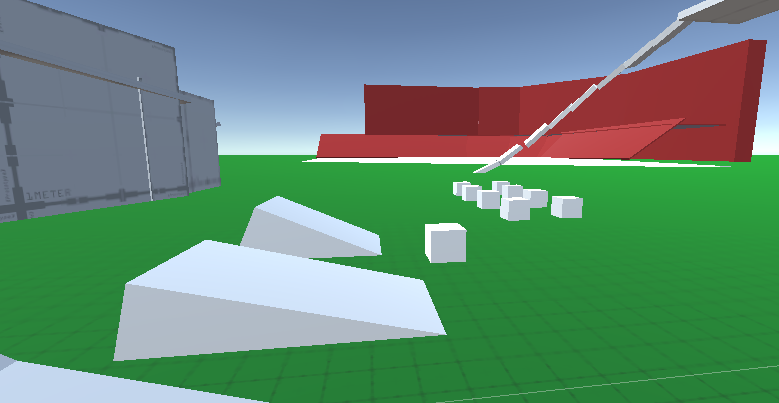
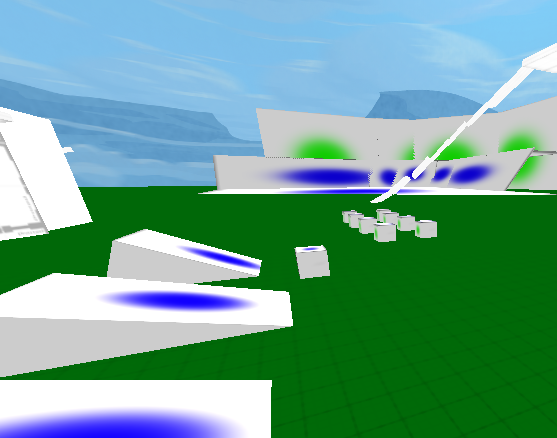
Finally, the scene system works well and it allowed us to easily export the level design scenes to test them on the NekoEngine.


Comparison of the Unity scene (left) and Neko imported scene (right)
How to go further
This scene manager is as I just said based on our project. So it would be interesting to implement loading and switching between several scenes.
What I learned
The implementation of this system allowed me to learn many things.
First of all, I learned a lot about Unity tool production and how exporting JSON files from Unity works.
I also learned a lot about how JSON validator works and the possibilities of using them.
Then, by importing the components in ECS, it allowed me to better understand the ECS and to better take it in hand.
Finally, this task allowed me to understand the importance of keeping an eye on the objective to avoid the production of useless elements for the project
Thanks to the feedback from my teachers, I understood that it was important not to base a system on a library. Indeed, this avoids having to redo a system when it is necessary to change the library.